
1903 "Orchid" S-Bend Corset
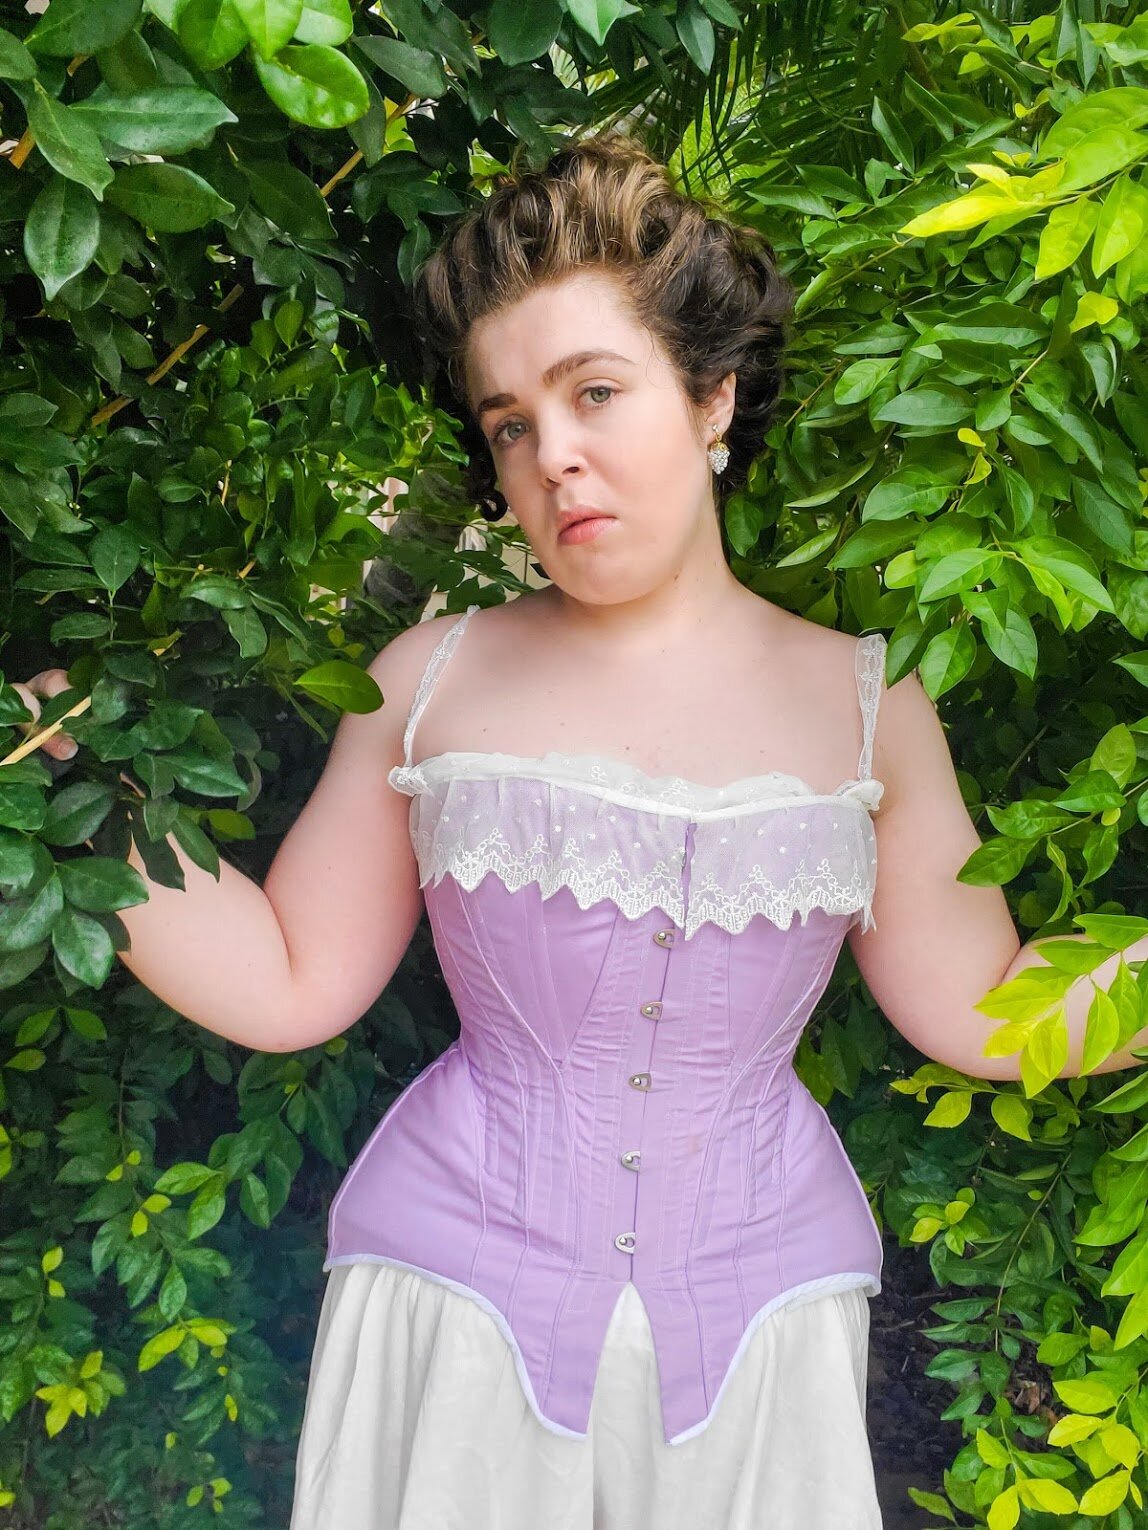
I wanted to deval into a new era, the Edwardian one, which meant another round of undergarments. After making the turn-of-the-century combinations it was time for most important article, the infamous s-bend corset. The pattern I used was the lovely Truly Victorian 1903 Corset pattern, there are multiple cup options, three bust heights, and three hip lengths. I chose the b-cup, high bust, and long hip options. I chose this lovely kona cotton in the color “thistle” for the fashion layer and a cotton coutil for the strength layer.

hip gore before seams where trimmed
The first step was cutting the pieces, the back, middle back, side back, side front, front, two hip gores, and two bust gores out of both the purple cotton and the coutil. I then hand-basted the layers together on every piece save for the fronts, because of my chosen way of busk insertion. I then sewed the backs to the middle backs and then to the side backs using a contrasting white thread. Before I sewed the side backs to the side fronts, I had to insert the hip gores. I matched the notches and sewed the gore to the bottom of both the side front and the side back then continued the seam upwards, attaching the side back to the side front. Following the insertion of the hip gores I attached the side front to the middle front and then paused for I had reached the point in the corset where I needed to attach the busk. This process is hard to explain via text so here are some references (1) and (2). After the busk was inserted I sewed the middle front to the bust gores and then to the front piece in the same manner as the hip gores. Now all the pieces were finally seamed together now it was time to finish the seams.

close up of waist tape and boning channel placement
I finished the seams using the welt seam method. All of the seam allowance save for one layer of coutil was trimmed down, that over layer that was not trimmed down was folded over to encase the other raw edges and sewn down. After all the seams were finished, I pinned on the waist tape, for which I used a white petersham ribbon, then the boning channels . The boning channels where positioned according to the pattern instructions, 9 bones for each side of the corset. You’ll notice that my bones do not follow my seamlines that is because in Edwardian corsets the bones running vertically in channels, regardless of seamlines unlike in previous Victorian corsets when bones where usually placed following seamlines. I ended the boning channels 3” from the bottom of the corset in order to enable me to sit comfortably.

close up of bias tape being sewn on
After the boning channels where sewn I bound the bottom of the corset using a white bias tape to match the white contrasting thread I used for my channels. Then the bones where inserted. I used 7mm synthetic whalebone for the all the channels save for the lacing bones for which I used white flat steel. After the bones where inserted I bound the top edge as well as the center back edge in white bias tape. The final step before this corset could be worn is to insert the grommets which was the next step, the grommet where placed an inch apart except at the waistline where they were placed ¾” apart to help with the strain the corset receives in that area. I then laced the corset using the bunny-ear method and a cotton lacing cord.

here is how the tailor pads were sewn in
Now the corset could be worn but it was not finished. I sewed a piece of lace across the top of the corset by hand using whip stiches for decoration. Then I tacked two tailor shoulder pads into the hip area of each side of the corset. This helps a LOT with the S-bend allusion and makes my waist look much smaller than it is. I also sewed the bust pads provided with the corset pattern; I didn’t attach them in any way just position them correctly was I’m lacing my corset down. The women of the past used padding, to great success, so why shouldn’t we?

here is how the finished corset looks