1946 “Panthera” Nightgown
This summer I experimented with drafting my own nightgown patterns, which was a bit more difficult than I anticipated. It was a bit troublesome to track vintage drafting manuals that had a substantial section on nightgowns or pajamas, so I had to make more mockups than I usually do. One of the patterns I came up with is below to help assist you in acquiring your vintage nightgown dreams!
For the colorway of this nightgown, I chose fabrics and laces to try and match this 1946 Hollywood Pattern (#1944). I selected a lovely cotton voile and 2” black lace for the trim. I used a little under 2 yards of the 54” wide voile and every inch of the 4 yards of trim I ordered.
The first step was to seam together the back panel at the center back seam. I used French seam throughout this project due to the sheer nature of the fabric and the delicate nature of the project.
(*note* the seam allowance throughout this project is 1/2” unless otherwise noted)
The front and back panels were then seamed together.
Now that the skirt was finished (minus the hem) it was time to move onto the bodice. I started with the back bodice, which was seamed together at the center back.
The neckline edge was finished by machine using a narrow rolled hem.
I then moved onto the front bodice. The neckline edge of the cup pieces were also finished by machine using a narrow rolled hem.
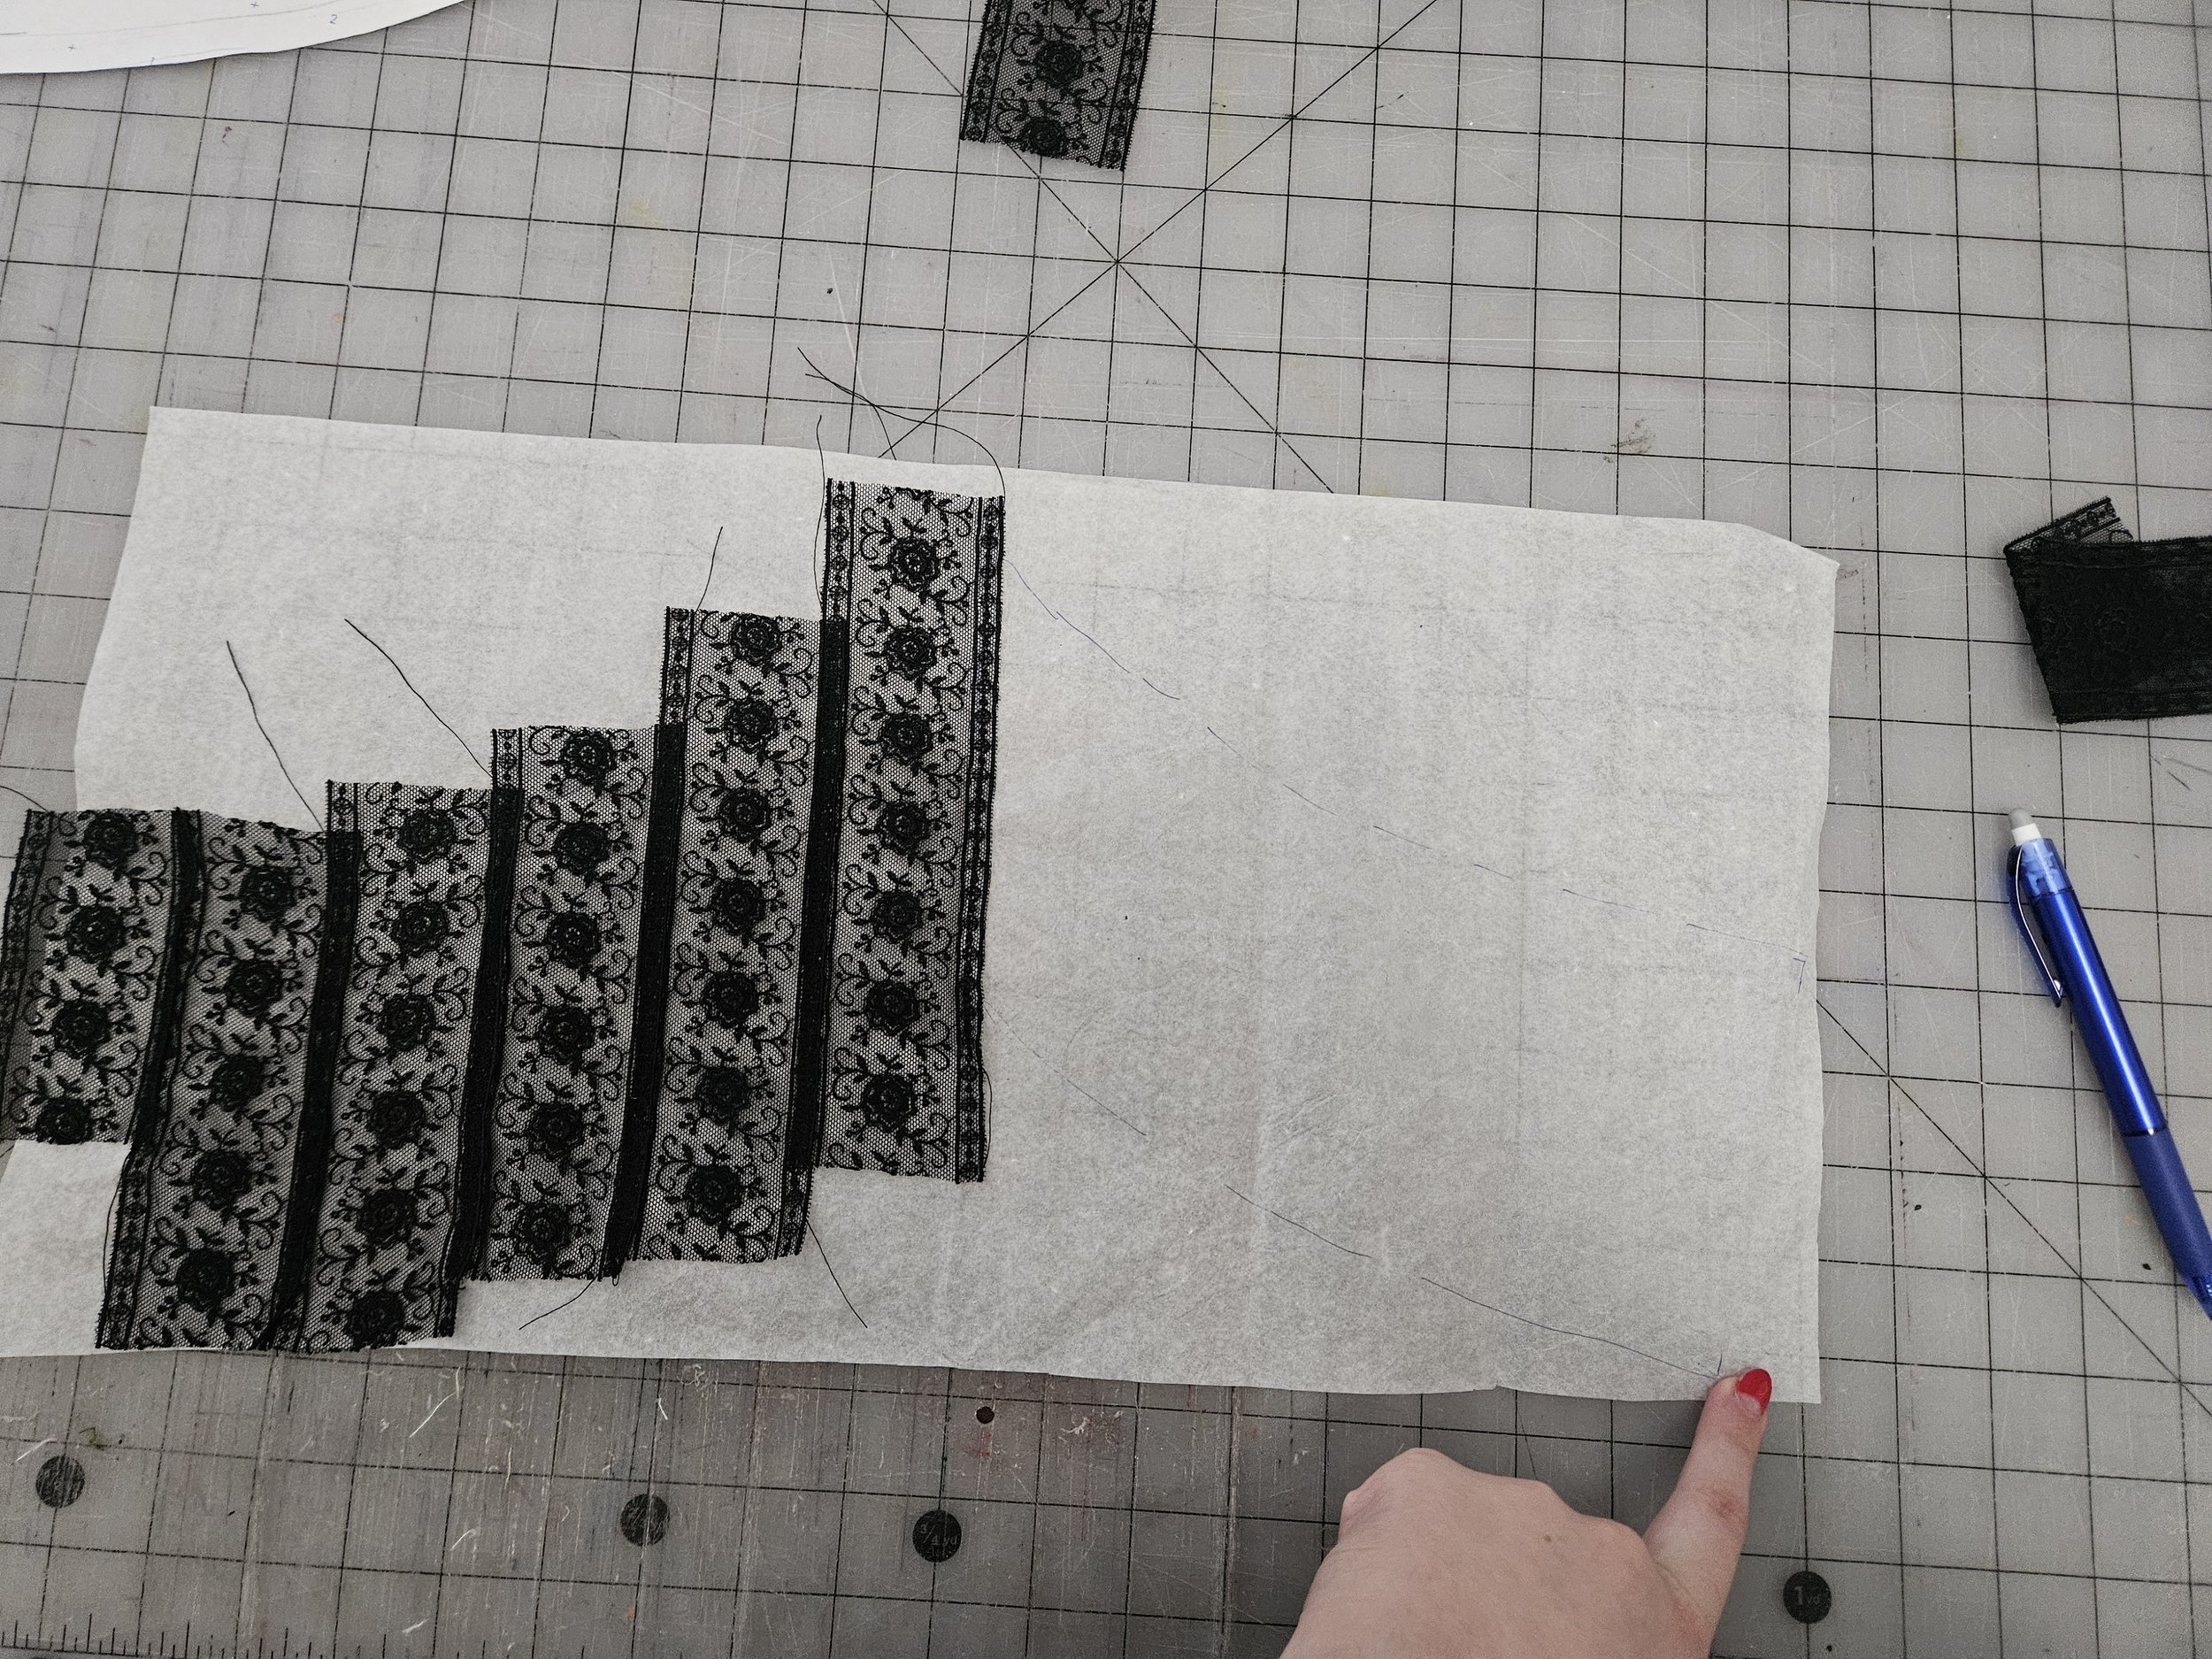
Now it was time to move on to the fun part of the project, the lace! In order to not rip my hair out while putting it together I used tissue paper as a backing for constructing the lace midriff pieces. I drew out my pattern piece onto some normal tissue paper and then took that to the machine.
I then started sewing strips of lace onto the tissue paper, lining up the edges to the center front of the panel pieces. I overlapped the lace about 1/8” with the previous piece then sewed that down. This lace is really nice b/c it has a definite border that lent itself nicely to being overlapped in this way. I continued this process until I reached over the edge of the pattern piece I had drawn previously.
Here is how the panel looked from the back once it was cut out. As you can see from the center front area, the tissue paper easily tore out. In case your lace is particularly delicate you might want to increase your stitch length to ensure the stability of the piece. I used my normal 12 stitches per inch and I have had no issues with wear and tear.
Now that the front lace midriff panel was complete I attached it to the front cup pieces. Before attaching them together the cup pieces were gathered in between the notches to fit.
I then bound the edge with bias tape for a clean finish and to prevent fraying. I used about 5 yards of 1” bias tape for this entire project.
I then constructed the back midriff lace panel in the same way as the front.
The back lace midriff panel was attached to the back bodice, making sure to gather in between notches on the back bodice piece.
This seam was bound with bias tape as well.
The front and back pieces were then seamed together using French seams.
The next step was to add the straps. My straps were 15” long. They were attached at the front at the points of the cup pieces. The straps were attached by hand and “bound” in bias tape to prevent fraying and discomfort while wearing.
The straps were attached to the back at the middle of the back panel. As you can see there was some excess fabric in the back so I made a nice box pleat and slapped the strap on top of it. It was sewn down on the interior of the nightgown by hand and bound using bias tape.
The skirt and bodice was then sewn together and bound using bias tape. The skirt was also loosely gathered to fit as well.
The final step necessary to create this nightgown was to hem it. I did a 1/2” rolled hem by machine.


